 Lynden Siding
 Siding Repair Along the Abbotsford, BC and Lynden Border
Homes on both sides of the Sumas border crossing deal with the same weather. Whether your address is in Abbotsford, BC or just south of it in Lynden, the siding on your house is fighting the same battle: long stretches of steady rain, salt-tinged marine air pushing inland off the Strait of Georgia and Puget Sound, and a moss season that can run most of the year in shaded, north-facing spots. Siding repair in this corridor isn't a cosmetic job. It's about catching moisture problems before they turn into rot, mold, or a full wall-sheathing replacement.
We work this area regularly, which matters more than it sounds. A contractor who only sees a house once knows what's wrong today. A contractor who works this border region knows what these homes look like five years after a bad repair, and what tends to fail first given how this valley's weather behaves.
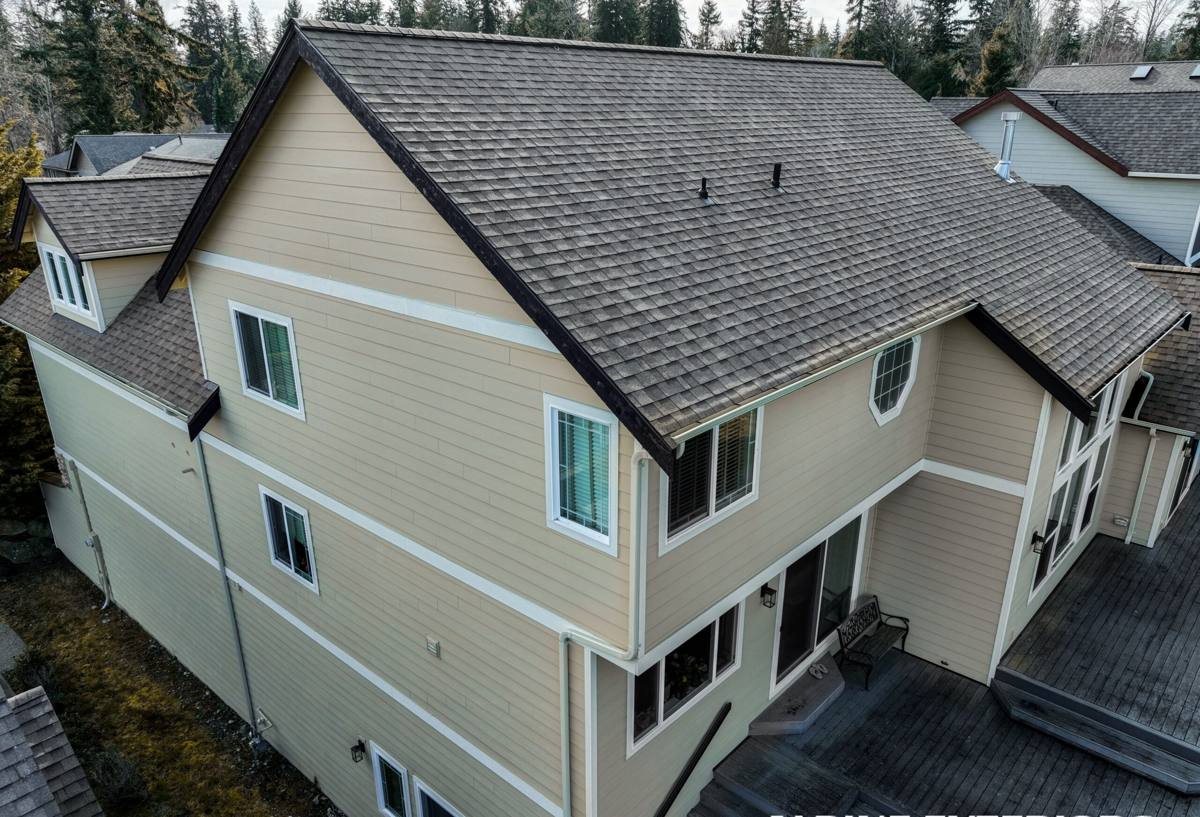
What This Climate Does to Siding Over Time
Three things drive most of the repair calls we get in this area:
- Driving rain. Wind-driven rain doesn't just wet the siding surface — it gets pushed sideways into laps, seams, and any gap around trim, fasteners, or penetrations. Over time this finds its way behind the siding if the water-resistive barrier or flashing isn't doing its job.
- Salt-laced marine air. Moist coastal air corrodes exposed metal fasteners, flashing, and staples faster than it would in a dry inland climate. Rust streaks bleeding through paint or caulk are almost always a sign of a fastener problem underneath.
- A long moss season. Shaded siding, especially on north and east walls or under overhangs and trees, stays damp long enough for moss and algae to take hold. Moss holds moisture against the siding surface and works into any crack or seam it can find, which accelerates whatever damage is already starting.
None of these are dramatic on their own. The problem is they compound. A small gap that lets in a little rain, combined with a shaded wall that never fully dries out, combined with a corroding fastener — that's how a small repair becomes a bigger one if it sits for a season or two.
Signs Your Siding Needs Repair, Not Full Replacement
Most siding problems we're called out for don't require re-siding the whole house. Here's what typically points to a repair instead:
- A cracked, chipped, or impact-damaged board in one or two locations, with the rest of the siding still sound
- Soft or spongy spots limited to a specific area — often near a downspout, a roof-wall intersection, or a window
- Visible gaps at seams, corners, or trim where caulking has failed or pulled away
- Staining or streaking that traces back to a single point, like a leaking gutter or a poorly flashed penetration
- Moss or algae buildup that's cosmetic on the surface but hasn't compromised the material underneath
The distinction matters because it changes the scope of the job, and the cost, significantly. Part of a proper repair visit is confirming which situation you're actually in before any work starts.
When It's More Than a Repair
If moisture has been getting behind the siding for a while, the damage is often hidden until a board is pulled off. Soft sheathing, black staining on the house wrap, or a musty smell near an exterior wall are signs the problem has moved past the siding itself. We'll tell you plainly if that's what we find — a patch over a wet wall doesn't fix anything, it just hides it for another season.
Common Repair Scenarios We See
| What's Happening | Usual Cause | What the Fix Involves |
|---|---|---|
| Cracked or split board, single location | Impact damage, or a board fastened too tight with no room to expand and contract | Cut out and replace the damaged section, re-fasten correctly, reseal and touch up finish |
| Rust streaks below fastener heads | Corroded nails or staples, common in salt-influenced marine air | Remove and replace fasteners with corrosion-resistant hardware; check for water intrusion at that point |
| Gapping or buckling at seams | Failed caulk, or siding installed without proper expansion gaps | Reseal with the right joint treatment, or reposition boards if spacing was the root cause |
| Soft or discolored area near a downspout or roofline | Water being funneled onto the wall instead of away from it | Fix the water source first (gutter, flashing, kickout), then repair or replace the affected siding |
| Persistent moss on shaded walls | Limited sun exposure and airflow, prolonged dampness | Clean surface correctly, address any trapped moisture, and treat ongoing exposure with the right finish |
Our Repair Process
1. Diagnose Before Touching Anything
We start by figuring out why the damage happened, not just what it looks like. A cracked board with no other issues gets treated differently than the same crack sitting next to a leaking gutter. Fixing the symptom without fixing the cause just means we're back at the same spot in a year or two.
2. Check What's Behind the Siding
Any area with suspected moisture intrusion gets opened up enough to check the sheathing and water-resistive barrier underneath. This is the step that gets skipped by anyone doing a quick patch job, and it's the step that actually determines whether the repair will hold.
3. Match Materials Correctly
Replacement pieces need to match the existing siding's profile, exposure, and finish as closely as possible. This is straightforward on homes with James Hardie fiber cement siding, since the product line and color are documented and consistent. It's much harder on older wood, vinyl, or discontinued products where an exact match may not exist anymore.
4. Install to Spec, Not Just to Look Right
Correct fastening, proper flashing at any disturbed area, and the right sealant in the right joints — a repair that looks fine from the ground but skips these details is a repair that fails again.
5. Finish and Walk the Job With You
We finish the repaired area to blend with the surrounding siding and walk you through what we found, what we fixed, and anything worth keeping an eye on going forward.
Why the Original Siding Material Affects Every Future Repair
We install and repair James Hardie fiber cement siding exclusively, and one reason is how it behaves over the life of a repair, not just at installation. Hardie's ColorPlus factory finish is manufactured to a documented formula, which means a repaired section from years later can be matched far more reliably than with products where color and profile availability drift or get discontinued. Hardie's HZ product lines are also engineered for exactly this region's exposure — wind-driven rain, sustained moisture, and freeze-thaw swings — so a correctly repaired Hardie wall tends to perform like the rest of the house instead of becoming a weak point.
Materials like vinyl, primed wood, or other fiber cement brands aren't inherently bad, but they make future repairs harder to match invisibly and can behave differently under this area's specific rain and moisture patterns. We don't install those products, and part of the reason is that we've seen what a mismatched or poorly matched repair looks like five years down the road.
Repair vs. Replace: What Actually Drives the Decision
| Factor | Favors Repair | Favors Full Replacement |
|---|---|---|
| Extent of damage | Isolated to one or a few boards or sections | Spread across multiple walls or the majority of the house |
| Age and condition of remaining siding | Siding is otherwise sound and reasonably current | Siding is near or past its expected service life |
| Underlying moisture damage | Sheathing and barrier are dry once opened up | Rot or persistent moisture found in multiple areas |
| Material availability | Matching profile and color are still available | Original product discontinued with no close match |
| Root cause | Root cause is fixable (flashing, gutter, sealant) | Root cause is systemic (original install quality, wrong product for the exposure) |
A good contractor will tell you when repair is the right call, even if replacement pays more. If a house genuinely just needs a few boards addressed and the rest of the siding has years left in it, that's what we'll recommend.
Why Hiring a Crew That Already Works This Border Region Matters
Abbotsford, BC and Lynden sit close enough together that they share weather patterns, but not every contractor treats them the same, and that's a mistake. A crew that mostly works drier inland climates may not think twice about a fastener choice or a sealant type that matters a great deal here, where marine air and sustained rain are the norm rather than the exception. Local experience means recognizing which wall orientations tend to hold moisture longest, which repair shortcuts don't hold up through a wet Whatcom County winter, and which failures are common enough in this area to check for even when they're not the reason you called.
It also means being straightforward with you about scope. We'd rather tell you a job is a two-board repair than talk you into something bigger than the house needs — and we'd rather tell you honestly when a "repair" is actually a sign of a bigger moisture problem than patch over it and let you find out later.
Simple Maintenance That Prevents Repair Calls
- Keep gutters clear so water isn't overflowing directly onto siding below
- Trim back vegetation and branches that keep a wall shaded and damp
- Rinse moss and algae off siding gently before it builds up thick enough to trap moisture
- Walk the exterior once or twice a year and look for cracked caulk, gapping seams, or rust streaks
- Address small issues — a hairline crack, a loose piece of trim — before the next wet season, not after
Catching problems early is genuinely the cheapest siding decision a homeowner in this area can make. A five-minute walk around the house each fall costs nothing and can save a much bigger repair bill later.
If you're noticing damage, staining, or moss buildup on your siding anywhere in the Abbotsford, BC or Lynden area, we're happy to take a look and give you an honest read on what's going on and what it'll take to fix it. Use the form below to request a free, no-pressure estimate.